
Settings
Everything that is neither a message nor a number. Your profile, your bots, and the entry points to the developer and security screens.
Go to Settings. What you see depends on your role, several sections are owner-only and are hidden entirely for operators and viewers.
Profile
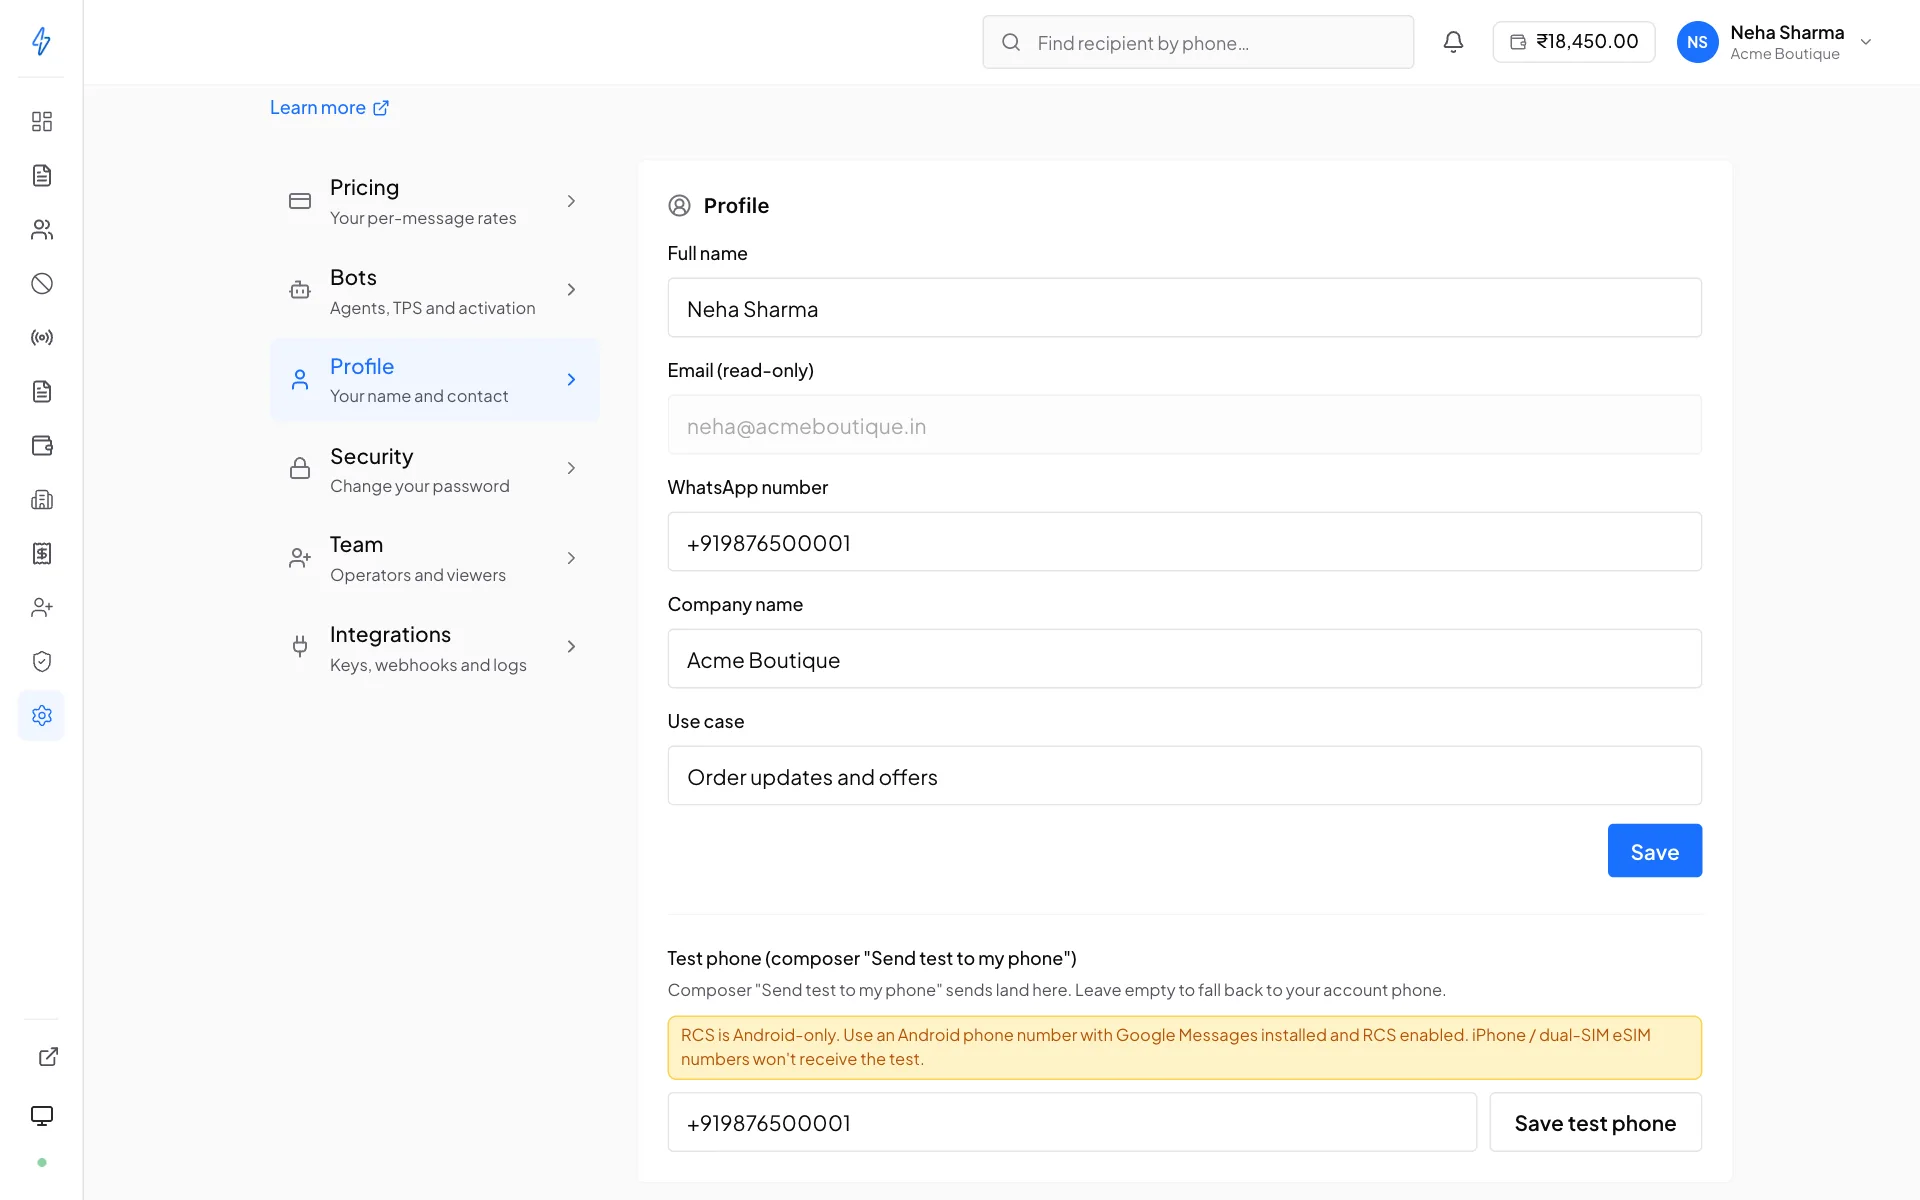
Your name, email, WhatsApp number, company name and use case. The test phone is set here too.
The email is your sign-in identity and cannot be changed here. For the account owner it is also the account's identity, so changing it means contacting support. Team members are in the same position, a member's email is how their access is scoped.
Keep the WhatsApp number current: it is used for account recovery.
Password
Change your password by entering the current one and a new one of at least 8 characters. Changing it signs out your other sessions.
Everyone manages their own password. The owner cannot see or set a team member's, and a member resetting theirs affects nobody else. If you have forgotten it, use Forgot password on the sign-in screen instead.
Bots
A row per bot, showing its name, bot ID, status, send-rate budget (TPS) and activation date. A suspended bot has a red shield by its name: point at it to read the reason. Your per-message prices are under Pricing.
From here you can open a bot's auto-reply rules and, as the owner, apply for another bot or use Make default to make an active bot your default bot.
See Managing bots for what each status means.
Pricing
Settings → Pricing shows your price for each message the network accepts, for each message type: promotional, transactional and OTP. See Per-message price. The account owner also sets the daily spend limit here.
Daily spend limit
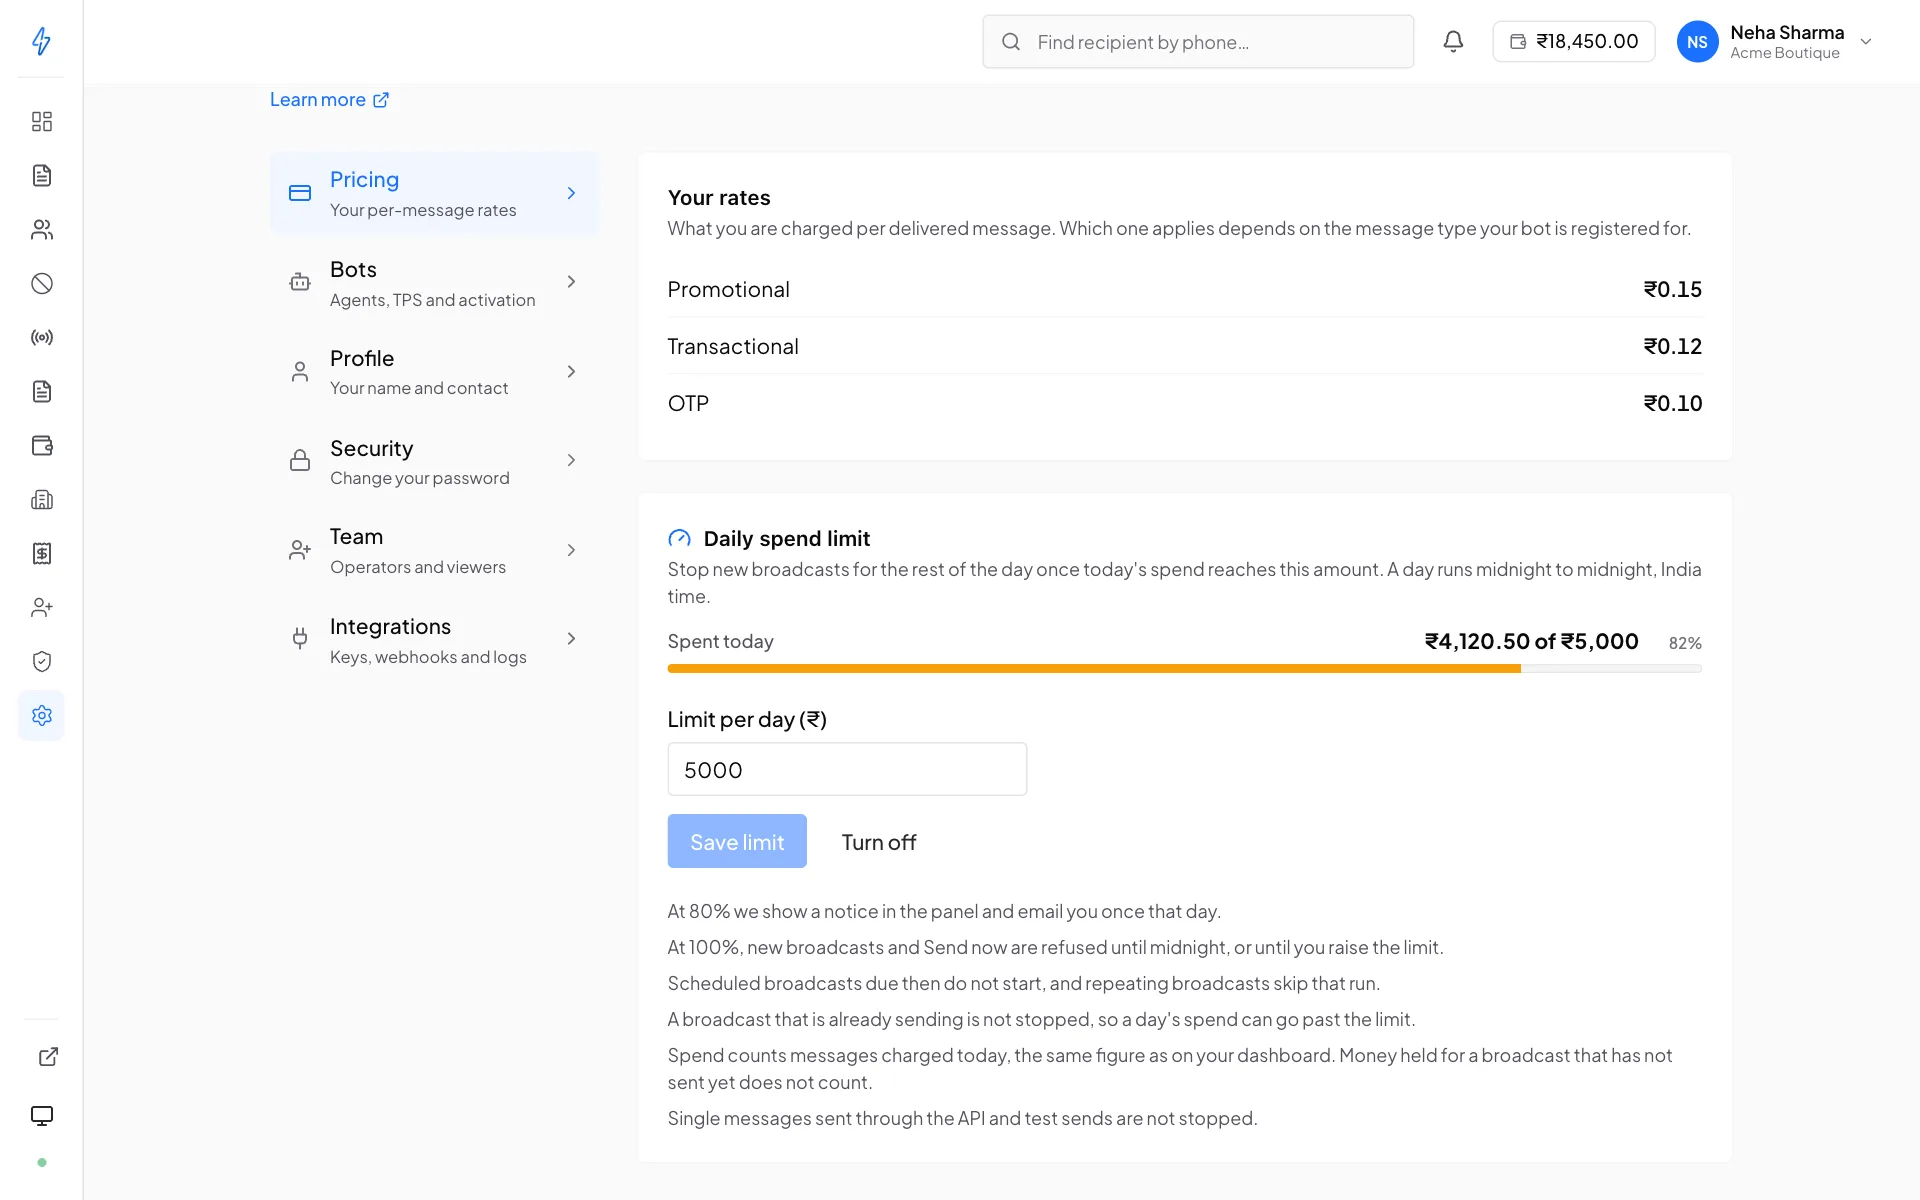
A daily spend limit stops new broadcasts for the rest of the day once today's spend reaches the amount you set. It is off until the owner sets it, and only the account owner sees this card.
Open the card
Go to Settings → Pricing. The Daily spend limit card is under your prices.
Enter the limit
Type the amount in Limit per day (₹), for example
5000. It can be anything from ₹1 to ₹1,00,00,000.Press Save limit
You see Daily limit saved. The new limit counts at once.
To remove the limit, press Turn off and confirm. New broadcasts then no longer stop when a day's spend gets high.
The card shows Spent today with a bar, for example ₹4,120.50 of ₹5,000: green below 80%, amber from 80% and red at 100%. With no limit set, it shows only Spent today: ₹4,120.50. If it says We could not read today's spend right now., the limit does not stop anything until the spend can be read again.
Good to know:
- A day runs midnight to midnight, India time. At midnight the count starts again from zero.
- A broadcast that is already sending is not stopped, so a day's spend can go past the limit.
- Spend counts the messages charged today, the same figure as on your dashboard. Money held for a broadcast that has not sent yet does not count. Prepaid and postpaid accounts work the same way.
- Single messages sent through the API and test sends are not stopped. Retarget only builds a list, so it is not stopped either.
- A scheduled broadcast stopped by the limit says Not started on its page, and nothing was sent. Use Duplicate to send it. See When the daily spend limit is reached.
- Today's spend is checked every few minutes, so a notice can come a few minutes after the 80% or 100% mark is passed. After you change the limit, you are told again if the new one is crossed that day. The email still comes at most once a day.
- Every change to the limit is recorded in the audit log.
Test phone
One number, saved once, used for every test send. Set it to your own phone
in E.164 (+919876543210).
Set this before you build your first template
A test send is the only way to see how a template actually renders, how a title truncates, whether an image is legible at phone size, whether a button label fits. The preview in the composer is close, but a real device is the thing that tells you.
Test sends are charged like any other message and appear in your history, and they count in the totals on your dashboard and reports.
On some bots, the phone has to accept an invitation first
Saving the number does more than store it. Some bots, until they have fully launched, can only deliver to numbers registered as testers on them. On those bots, saving the test phone registers it as a tester, and an invitation goes to the phone.
The number cannot receive anything from that bot until the person accepts the invitation, and the invitation expires after 24 hours. Saving the same number again sends a new one, which is what to do if it has gone stale.
A test that never arrives is usually this
If a test send reports success and nothing reaches the phone, check that the invitation on the phone was accepted before you suspect the template or the bot. The message was accepted; the bot was simply not allowed to deliver to that number yet.
Other bots have no such step, and the number works as soon as it is saved.
Light and dark
At the bottom of the sidebar, below the navigation, is a Light / Dark / System switch.
System is the default and follows whatever your computer is set to, so the panel goes dark in the evening if your machine does. Light and Dark override that and stay where you put them, per browser.
The device previews on the template and broadcast composers follow the mode too, because Google Messages has a dark theme of its own and a preview should look like the phone it is imitating.
Announcements
Occasional notices from Splashify, maintenance windows, changes worth knowing about. They appear as a banner on the dashboard; dismissing one is per-user, so your colleagues still see it.
Developer settings
Three screens, reached from Settings:
API keys
Server-to-server tokens for the RCS API. Owner only.
Webhooks
Receive delivery, read, click and reply events at your own URL.
Event log
Every webhook delivery attempt and what your endpoint replied, the first place to look when an integration misbehaves.
Security settings
Two-step verification
Protect your own sign-in with an authenticator app.
Audit log
The changes made on the account, by you and your team. Owner only.
What is hidden from team members
Operators and viewers do not see these Settings sections at all:
- API keys
- Audit log
- The bot application entry point
- Make default on the bots list
- The daily spend limit
Nor do they see Wallet, Billing profile, Invoices or Team anywhere in the panel. If a colleague says a section is missing, this is why, see Team members.
Two-step verification is the exception: it protects the signed-in person, not the account, so every role can set it up for themselves.